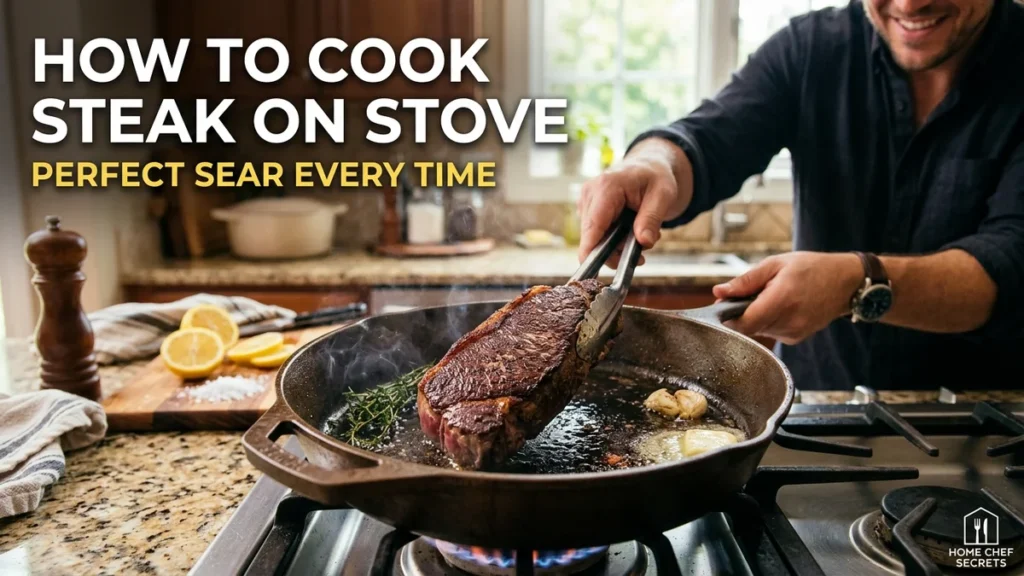
I believe that learning how to cook steak on stove is one of the most valuable skills any home cook can develop. It requires no grill, no outdoor space, and no complicated equipment. All you need is a heavy skillet, a good cut of beef, and a clear understanding of heat management. In my analysis, the stovetop method offers something that grilling cannot: complete control over every variable. Pan temperature, crust development, basting frequency, and internal temperature all remain visible and adjustable in real time.
From my perspective, the 2026 landscape of home cooking has made stovetop steak techniques more relevant than ever. Many people live in apartments without outdoor grilling space. Others simply prefer the convenience of cooking indoors. The good news is that a properly executed stovetop sear consistently produces results that rival or exceed what many restaurants achieve. The key lies in understanding the science behind the sear, mastering a few essential techniques, and avoiding the common mistakes that lead to tough, gray, or overcooked meat. For more engaging content on food, games, and culture, you can also visit Wordplay 2018.
Key Takeaways for Cooking Steak on the Stove
Before we explore the details, I want to summarize the most important principles that will guide our discussion. First, the quality of your sear depends on a dry surface and a screaming-hot pan. Second, the thickness of your steak determines your cooking method and timing. Third, a meat thermometer is not optional equipment; it is essential. Fourth, butter basting in the final minutes transforms a good steak into an exceptional one. Fifth, resting the steak after cooking is as important as the cooking itself. Finally, understanding carryover cooking prevents you from overshooting your target temperature.
What Makes the Stovetop Method Superior for Certain Steaks
I have found that the stovetop method excels for specific cuts and situations, even though grilling has its own distinct advantages. The sustained, even contact between the steak and a hot cast iron surface generates a deeper, more uniform Maillard crust than open flame typically achieves. The Maillard reaction, which is the chemical process that creates browning and flavor, requires high heat and a dry surface. A cast iron skillet delivers both more consistently than most grills.
From what the research shows, the stovetop method gives you total control over every variable. Pan temperature, basting frequency, crust color, and internal temperature all remain visible and adjustable in real time. A well-seasoned cast iron skillet retains heat so efficiently that even a thick 1.5-inch ribeye develops a deeply caramelized crust within three to four minutes per side without any hot or cool zones to navigate.
However, the stovetop method also has limitations. Thin cuts can overcook before a proper crust forms. Bone-in cuts take longer to cook and are better suited to grilling or oven finishing. Very thick steaks, those above 1.5 inches, often require oven time to reach the desired internal temperature without burning the exterior. Understanding these trade-offs helps you choose the right method for your specific cut.
Choosing the Right Cut of Steak for Stovetop Cooking
Let us consider the characteristics that make a steak well-suited to stovetop cooking. The ideal cut for this method possesses three qualities: moderate thickness, good marbling, and a boneless structure.
Thickness matters because cooking steaks on the stove is a fast process. You want steaks that are between 1 and 1.5 inches thick. Steaks thicker than 1.5 inches often require oven finishing to cook through without burning the crust. Cuts less than 1 inch thick, such as flank or flat-iron steaks, can also work but cook much faster and often benefit from a marinade to help break down tough connective tissue.
Marbling, the streaks of white fat that run throughout the meat, is essential for flavor and juiciness. As the steak cooks, the marbling renders and bastes the meat from within. Ribeye and New York strip are excellent choices because they offer generous marbling and forgiving cooking characteristics. Filet mignon also lends itself well to this method, though it has less fat and therefore requires more careful temperature monitoring.
Boneless cuts are preferable because bone-in steaks take longer to cook and are better suited to grilling or oven finishing. The bone also creates uneven cooking surfaces that can complicate the searing process on a flat skillet.
Why Ribeye and New York Strip Excel on the Stovetop
I believe that ribeye and New York strip represent the ideal stovetop steaks for most home cooks. Ribeye delivers the most forgiving result thanks to its intramuscular fat, which self-bastes as it renders. Fat content typically sits at 20 to 25 percent for a USDA Choice ribeye. This means the steak remains juicy even if you accidentally cook it a few degrees past your target.
New York strip is leaner, typically containing 12 to 15 percent fat, but it produces a firmer, beefier bite with an outstanding crust. The strip’s uniform shape also ensures even contact with the pan, which promotes consistent browning. Both cuts are widely available and reasonably priced compared to premium options like filet mignon or dry-aged ribeye.
Essential Equipment for Perfect Stovetop Steak
I have found that successful stovetop steak cooking requires very little specialized equipment, but the equipment you do use must be of good quality. The most important tool is a heavy-bottomed skillet. Cast iron is the preferred choice because it retains heat exceptionally well and can withstand the high temperatures required for a proper sear. Stainless steel also works well, though it does not retain heat quite as effectively as cast iron.
A meat thermometer is not optional. It is the single most important tool for achieving your desired level of doneness consistently. The difference between a perfectly medium-rare steak and an overcooked one can be just a few degrees. An instant-read thermometer allows you to monitor the internal temperature precisely and remove the steak at the right moment.
You will also need tongs for flipping the steak and handling it safely, a cutting board for resting the meat, and aluminum foil if you choose to tent the steak during resting. Some cooks prefer to use a splatter guard to contain the oil and butter that can pop and splatter during the searing process.
Step-by-Step Instructions for Cooking Steak on the Stove
How to Cook Steak on Stove? Now let us walk through the complete process, from preparation to plating. I have organized this section as a sequential guide that you can follow each time you cook.
Step 1: Bring the Steak to Room Temperature
Remove the steak from the refrigerator 30 to 45 minutes before cooking. A cold steak center requires longer pan time to reach the target temperature, which overcooks the exterior before the interior is ready. This step ensures that the steak cooks evenly from edge to center.
Step 2: Pat the Steak Completely Dry
Surface moisture is the enemy of a good crust. Water creates steam when it hits the hot pan, and steam suppresses the Maillard reaction. Pat the steak dry on all sides with paper towels before seasoning. This step is non-negotiable if you want a deep, flavorful crust.
Step 3: Season Generously
Season both sides of the steak with kosher salt and freshly cracked black pepper. Apply the salt at least 45 minutes before cooking if possible, or immediately before if you are short on time. The salt draws moisture to the surface initially, but given enough time, it dissolves and is reabsorbed, seasoning the meat throughout. If you apply salt just before cooking, it remains on the surface and contributes to the crust.
Step 4: Preheat the Skillet
Place a cast iron or stainless steel skillet over high heat for three to four minutes until it reaches searing temperature. You will know the pan is ready when a drop of water evaporates instantly or when a thin wisp of smoke rises from the surface. Add one tablespoon of high-smoke-point oil, such as avocado oil, and swirl it to coat the pan.
Step 5: Sear the First Side
Place the steak flat in the skillet and do not move it. Let it sear undisturbed for three to four minutes until a deep brown crust forms. Resist the temptation to flip the steak repeatedly. One solid sear per side creates the best crust.
Step 6: Flip and Add Butter and Aromatics
Flip the steak using tongs. Add two to three tablespoons of unsalted butter, along with crushed garlic cloves and fresh herbs such as thyme or rosemary. The butter will melt and foam, creating a rich basting liquid.
Step 7: Baste the Steak
Tilt the pan slightly and use a spoon to scoop the foaming butter over the top of the steak repeatedly. This basting process accelerates crust formation on the top surface while pulling the internal temperature toward your target. Continue basting for one to two minutes.
Step 8: Check the Internal Temperature
Insert an instant-read thermometer into the thickest part of the steak, avoiding the bone if present. Remove the steak when it reaches five degrees below your target temperature. For medium-rare, pull at 125°F to 130°F. The temperature will continue to rise during resting.
Step 9: Rest the Steak
Transfer the steak to a cutting board and let it rest for five to ten minutes. Resting allows the juices to redistribute throughout the meat, ensuring that each bite is juicy and tender. If you cut into the steak immediately, the juices will run out onto the board, leaving the meat dry.
Step 10: Slice Against the Grain and Serve
After resting, slice the steak against the grain. Look for the direction of the muscle fibers and cut perpendicular to them. This shortens the fibers and makes each bite more tender. Serve immediately with flaky sea salt on top.
Table 1: Steak Doneness Temperatures and Resting Guidelines
How to Cook Steak on Stove? The following table provides the internal temperatures for each level of doneness, along with the recommended pull temperature and final temperature after resting. I have designed this table to help you achieve consistent results every time you cook steak on the stove.
| Doneness | Pull Temperature | Final Temperature (After Rest) | Center Appearance |
|---|---|---|---|
| Rare | 120°F (49°C) | 125°F (52°C) | Cool red center |
| Medium-Rare | 125–130°F (52–54°C) | 130–135°F (54–57°C) | Warm red center |
| Medium | 135–140°F (57–60°C) | 140–145°F (60–63°C) | Warm pink center |
| Medium-Well | 145–150°F (63–66°C) | 150–155°F (65–68°C) | Slightly pink center |
| Well-Done | 155°F (68°C) | 160°F+ (71°C+) | No pink, mostly brown |
The most important takeaway from this table is that you should always pull the steak five degrees before your target temperature. Carryover cooking will finish the job during the resting period. Medium-rare, which lands at 130°F to 135°F after resting, remains the most popular target because it offers the best balance of tenderness, juiciness, and flavor.
Table 2: Approximate Cooking Times by Steak Thickness
The following table provides approximate cooking times for different steak thicknesses on the stovetop. I have included this table to help you plan your cooking process, though I want to emphasize that these times are guidelines only. Your pan, your stove, and the starting temperature of your steak will all affect the actual cooking time.
| Thickness | Sear Time Per Side | Total Estimated Time | Notes |
|---|---|---|---|
| 1 inch | 3–4 minutes | 6–8 minutes | Best for quick weeknight cooking |
| 1.25 inches | 4–5 minutes | 8–10 minutes | Good balance of crust and interior |
| 1.5 inches | 4–5 minutes | 8–10 minutes plus oven | May require oven finishing |
| 1.75 inches | 5–6 minutes | 10–12 minutes plus oven | Oven finishing recommended |
| 2 inches | 5–6 minutes | 12–15 minutes plus oven | Oven finishing essential |
The most important takeaway from this table is that thickness determines your method. Thin steaks cook entirely on the stovetop. Thick steaks require a hybrid approach that combines stovetop searing with oven finishing. Always rely on your meat thermometer rather than time alone to determine doneness.
The Science of Carryover Cooking and Why It Matters
I believe that understanding carryover cooking is essential for anyone who wants to master How to Cook Steak on Stove. Carryover cooking refers to the phenomenon where the internal temperature of the meat continues to rise after it is removed from the heat source. This happens because the exterior of the steak is much hotter than the interior, and heat continues to transfer inward during the resting period.
The amount of carryover cooking depends on several factors. Thicker steaks experience more carryover because they retain more heat. Steaks cooked at higher temperatures also experience more carryover. As a general rule, you can expect the internal temperature to rise by five degrees Fahrenheit during a five-minute rest. For very thick steaks, the rise can be as much as ten degrees.
This is why I always recommend pulling the steak five degrees before your target temperature. If you want a medium-rare steak at 130°F, pull it at 125°F. The temperature will rise to 130°F during the rest, and you will have a perfectly cooked steak. If you wait until the thermometer reads 130°F before pulling, the final temperature will be closer to 135°F, which is medium rather than medium-rare.
“Sear them for about 2 minutes on each side in the cast iron skillet.”
— Robbie Shoults, celebrity chef and owner of Bear Creek Smokehouse, in an interview with Tasting Table
This quotation from Chef Robbie Shoults is valuable because it emphasizes the importance of high heat and quick searing. Shoults is describing the final step of a reverse-sear method, where the steak is first cooked low and slow in the oven and then finished in a screaming-hot skillet. The short searing time ensures that the crust develops without overcooking the interior. In my view, this principle applies whether you are reverse searing or cooking entirely on the stovetop. The sear should be fast and hot.
The Butter Basting Technique That Elevates Your Steak
I have found that butter basting is the technique that separates a home cook’s result from a steakhouse result. The process involves spooning foaming butter infused with garlic and herbs over the steak repeatedly during the final minutes of cooking. The hot fat accelerates crust formation on the top surface while simultaneously pulling the internal temperature toward your target.
To baste effectively, tilt the pan slightly toward you so the butter pools on one side. Use a spoon to scoop the butter and pour it over the steak. Repeat this process continuously for one to two minutes. The butter should be foaming, not burning. If the butter begins to brown too quickly, reduce the heat slightly.
The aromatics you add to the butter also matter. Crushed garlic cloves and fresh thyme or rosemary are classic choices. The garlic infuses the butter with a savory depth, while the herbs add a fragrant note that complements the beef. Some cooks also add a sprig of rosemary for a more resinous, pine-like aroma.
“A good cut of steak should be prepared medium rare … Steak can be cooked on the stovetop in a heavy bottomed skillet (or on the grill) just be sure not to overload the pan or you won’t get a good sear on the meat.”
— Chef advice published in Gulf Today
This quotation highlights two critical principles. First, medium-rare remains the recommended doneness for a good cut of steak because it preserves the meat’s natural tenderness and juiciness. Second, overcrowding the pan is a common mistake that prevents proper searing. When you place too many steaks in the pan, the temperature drops, and the steaks begin to steam rather than sear. In my analysis, this is one of the most frequent errors I observe in home kitchens.
Common Mistakes That Ruin Stovetop Steak
I believe that even experienced cooks sometimes fall into traps that compromise their results. Let us examine the most common mistakes and how to avoid them.
The first mistake is cooking a cold steak. A steak straight from the refrigerator will have a cold center that requires extended cooking time. By the time the center reaches the target temperature, the exterior is overcooked. Always let the steak come to room temperature for at least 30 minutes before cooking.
The second mistake is a wet surface. Moisture on the surface of the steak creates steam when it hits the hot pan. Steam prevents the Maillard reaction and results in a gray, steamed exterior rather than a brown, flavorful crust. Pat the steak completely dry with paper towels before seasoning.
The third mistake is an insufficiently heated pan. If the pan is not hot enough, the steak will not sear properly. It will release moisture and begin to stew rather than sear. Preheat the pan for three to four minutes over high heat until it is smoking slightly.
The fourth mistake is moving the steak too often. Constant flipping prevents the formation of a proper crust. Let the steak sear undisturbed for three to four minutes on the first side before flipping.
The fifth mistake is skipping the rest. Resting allows the juices to redistribute throughout the meat. If you cut into the steak immediately, the juices will run out, and the meat will be dry. Rest for at least five minutes, and up to ten minutes for thicker steaks.
The sixth mistake is not using a thermometer. Relying on time alone is unreliable because pan temperature, steak thickness, and starting temperature all vary. A meat thermometer removes the guesswork and ensures consistent results.
How to Adapt the Stovetop Method for Thick Steaks
Let us consider how to handle steaks that are thicker than 1.5 inches. These steaks require a hybrid approach because cooking them entirely on the stovetop would burn the exterior before the interior reaches the target temperature.
The solution is to sear the steak on the stovetop and then transfer the entire skillet to a preheated oven. Preheat the oven to 425°F (220°C). Sear the steak for two to three minutes per side on the stovetop, then place the skillet in the oven. Continue cooking until the internal temperature reaches five degrees below your target. This usually takes eight to ten minutes for a 1.75-inch steak.
This hybrid method gives you the best of both worlds: a deeply caramelized crust from the stovetop sear and even cooking through the center from the oven’s ambient heat. It is the preferred method for thick ribeyes and other premium cuts.
Resting the Steak: Why Patience Rewards You
I have found that resting is the easiest step to skip and the most important step to follow. When you cook a steak, the heat causes the muscle fibers to contract, squeezing moisture toward the center. If you cut into the steak immediately, those juices escape and pool on the cutting board. The result is a dry steak.
Resting allows the muscle fibers to relax and reabsorb some of the moisture. The juices redistribute evenly throughout the meat, ensuring that each bite is juicy and flavorful. A steak that rests for five to ten minutes will retain significantly more moisture than one that is cut immediately.
Some cooks worry that resting will make the steak cold. This is rarely a problem for individual steaks. Since most steaks only need to rest for five to ten minutes, they retain enough heat to stay warm for serving. If you are concerned about heat loss, you can loosely tent the steak with aluminum foil. However, many chefs advise against tenting because it can trap steam and soften the crust.
Expert Recommendations for Consistent Results
I recommend that you treat stovetop steak cooking as a repeatable process. Choose a steak of consistent thickness, use the same skillet each time, and rely on your thermometer rather than time. This approach allows you to develop a feel for the process and to make adjustments based on your specific equipment and preferences.
From what the research shows, the most successful home cooks are those who focus on the fundamentals. They dry the steak thoroughly. They preheat the pan properly. They sear without moving the steak. They baste with butter and aromatics. They pull the steak at the right temperature. They rest the meat before slicing. These six steps form the foundation of consistently excellent results.
I also recommend experimenting with different cuts and seasonings once you have mastered the basic technique. Try a dry-brined steak, where you salt the meat and let it rest uncovered in the refrigerator for several hours or overnight. The salt draws moisture to the surface and then dissolves, seasoning the meat deeply. Try different herb combinations in your butter baste. Try finishing with a compound butter or a pan sauce made from the drippings. The possibilities are extensive, and each experiment teaches you something new about the craft.
Conclusion
Learning How to Cook Steak on Stove is a skill that rewards patience, attention to detail, and a willingness to learn from each attempt. I believe that the stovetop method offers the most accessible path to steakhouse-quality results at home. It requires no specialized equipment beyond a heavy skillet and a thermometer, and it gives you complete control over every variable that affects the final outcome.
The most useful finding from this analysis is that consistency comes from process, not from luck. By following a reliable sequence of steps and using a thermometer to guide your decisions, you can achieve the same excellent result every time you cook. The sear, the baste, the temperature check, and the rest are the four pillars of stovetop steak success.
In my view, the practical lesson for any home cook is to start simple and refine your technique over time. Begin with a one-inch ribeye or New York strip. Pat it dry, season it generously, sear it in a hot skillet, baste it with butter and herbs, and pull it at 125°F. Rest it for five minutes, slice it against the grain, and serve it immediately. Once you have mastered that basic sequence, you can adapt it to thicker steaks, different cuts, and your own personal preferences. My advice is to cook steak on the stovetop at least once a week until the process feels natural. Your confidence and your results will improve with every attempt.
Frequently Asked Questions – How to Cook Steak on Stove
How Do I Know When the Pan Is Hot Enough for Steak?
The pan is hot enough when a drop of water evaporates instantly upon contact or when a thin wisp of smoke rises from the surface. You can also hold your hand a few inches above the pan; if you can only hold it there for one or two seconds, the pan is ready. Preheat a cast iron skillet over high heat for three to four minutes before adding oil and the steak.
What Is the Best Oil for Cooking Steak on the Stove?
Avocado oil is an excellent choice because it has a very high smoke point of approximately 520°F (271°C). Other good options include grapeseed oil, canola oil, and clarified butter. Avoid extra-virgin olive oil for high-heat searing because its smoke point is lower and it can burn, imparting an unpleasant flavor to the steak.
How Long Should I Rest a Steak After Cooking?
Rest a steak for five to ten minutes after removing it from the heat. Thicker steaks benefit from the longer end of that range, while thinner steaks need less time. Resting allows the juices to redistribute throughout the meat, ensuring that each bite is juicy and tender. The internal temperature will also rise by about five degrees during the rest, which is why you should pull the steak five degrees before your target temperature.
Can I Cook a Frozen Steak on the Stove?
Cooking a frozen steak on the stove is not recommended for the best results. A frozen center requires extended cooking time, which will overcook the exterior before the interior thaws and cooks through. Always thaw the steak in the refrigerator overnight or at room temperature for 30 to 45 minutes before cooking. If you must cook from frozen, use a lower heat setting and extend the cooking time, but expect less consistent results.
What Should I Do If My Steak Is Overcooked?
If your steak is overcooked, you can still salvage some of its juiciness by slicing it thinly against the grain and serving it with a sauce. A pan sauce made from the drippings, butter, and a splash of wine or broth can add moisture back to the meat. For future attempts, use a meat thermometer and pull the steak five degrees before your target temperature. The most reliable way to avoid overcooking is to monitor the internal temperature rather than relying on time alone.
Sources and References
- Meat Recipes Box. “How to Cook Steak on Stove – Perfect Sear Every Time.” MeatRecipesBox.com, 2026.
- Food Network. “How to Cook Steak on Stove.” FoodNetwork.com, 2026.
- Female Foodie. “Cast Iron Skillet Steak.” FemaleFoodie.com, 2026.
- The MeatStick. “Steak Internal Temperature: The Complete Doneness Guide.” TheMeatStick.com, 2026.
- Tasting Table. “The Absolute Best Way To Cook A Steak If You Don’t Have A Grill.” TastingTable.com, 2025.
- The Pioneer Woman. “Why You Should Always Let Meat Rest After Cooking.” ThePioneerWoman.com, 2026.
- Gulf Today. “Five mistakes to avoid when cooking steak, according to chefs.” GulfToday.ae, 2021.
- Sullivan’s Steakhouse. “Steak Cooking Time Chart & Tips.” SullivansSteakhouse.com, 2026.
Disclaimer
This article on How to Cook Steak on Stove is for informational and educational purposes only. The cooking times, temperatures, and techniques described are based on publicly available culinary resources and general best practices. Individual results may vary depending on the specific equipment, ingredients, and conditions in your kitchen. The quotations included in this article are attributed to their original sources and are reproduced for commentary and educational purposes. The author has no affiliation with any of the organizations or individuals mentioned. Always follow safe food handling practices and consult official food safety guidelines for specific concerns.